")
How to brighten eyes + teeth in Lightroom
Let’s face it, with two young children at home to take care of and a business to manage, sometimes coffee is the only thing that get me through the day. Seriously, I don’t know what I’d do without coffee literally all day. A lack of sleep makes coffee a necessity!
And my happy place is a nice glass of pinot noir when my husband and I finally get a minute to breathe after the kids are in bed after a long day. I suspect this might sound familiar to some of you out there…
“Can you whiten my teeth in Lightroom?”
While I love coffee and wine dearly, my teeth sure don’t. It’s tough to keep the ol’ pearly whites looking their best. And if you have a photoshoot coming up in your future… family, business, headshots, you’re likely wanting to look and feel your best.
You might be wondering where I’m going with this. Well, clients ask me all the time to “Photoshop” their photos to make their teeth and eyes brighter. For the record, I basically NEVER use Photoshop to alter someones physical appearance, but that’s a topic for another article (maybe a “Top 10 photographer pet peeves”? lol).
We’re all human beings and most of us aren’t “perfect”. Thank social media and filters for altering all our perceptions of beauty… again another topic I could go off on another time.
But before I answer this frequently asked question, I want to point out that my style is natural and minimalist, so I tend to not edit this way very much, if ever. However, there is indeed a way to make one’s teeth and eyes look naturally brighter using Lightroom if that is your desired goal. There are actually a few different ways to do it, which I’ve tried to simplify it into a step by step process.
How to whiten teeth in Lightroom
Lightroom is constantly updating their amazing features, and the brushes and masking are one that got a major update lately. There’s a built in brush for everything! Like teeth.
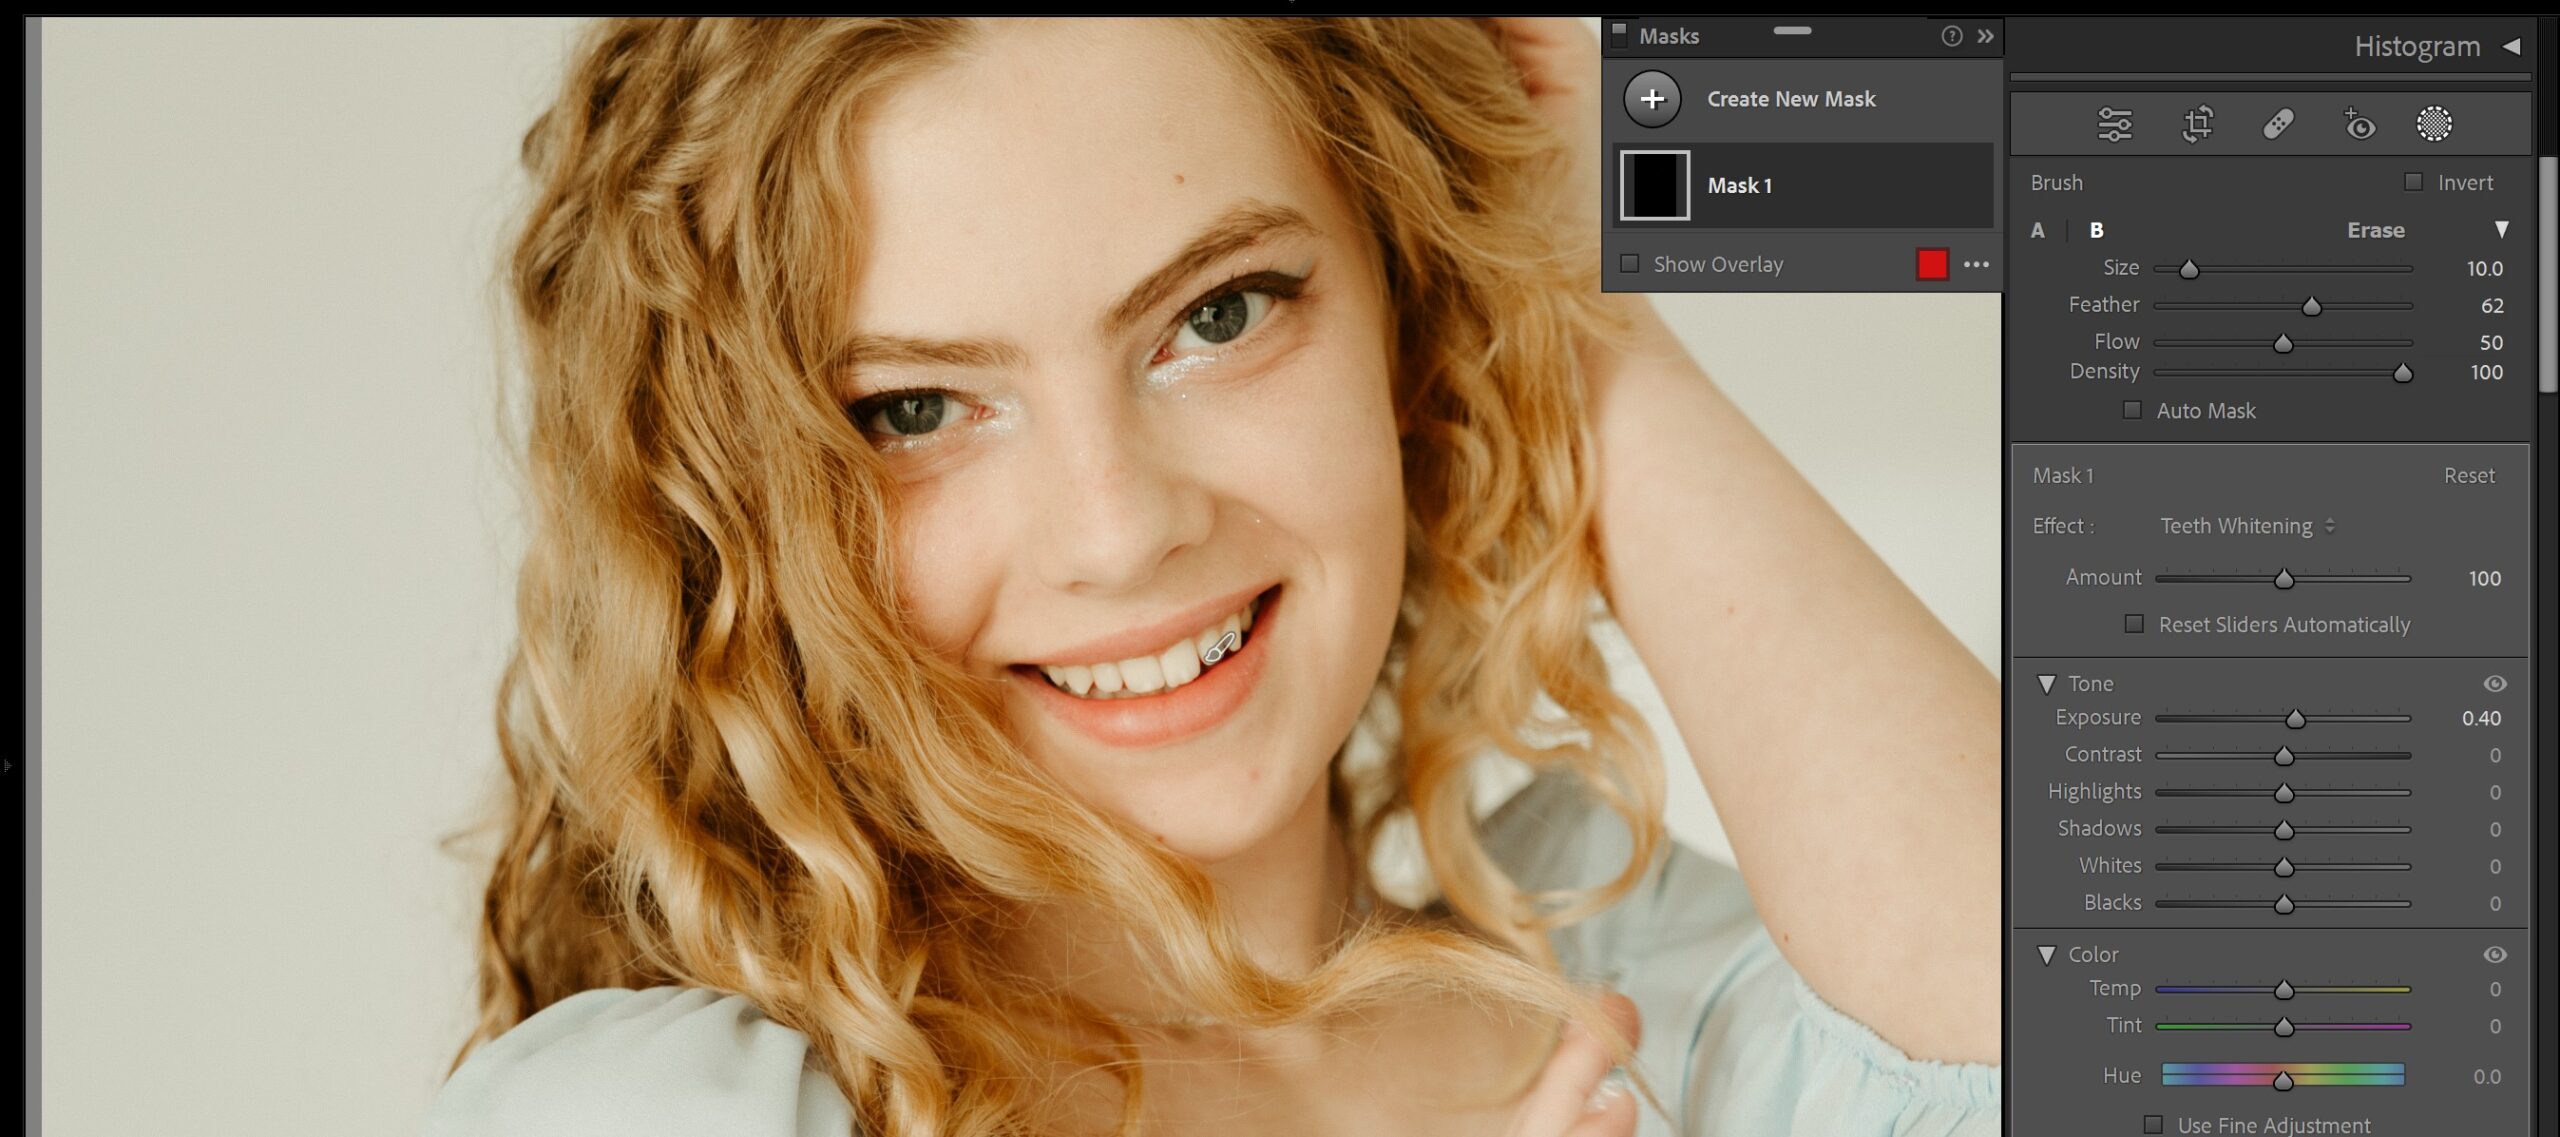
- Click on the Masking function on the right hand editing panel (or press Shift W).
- You will now find an Effects drop down menu of all the preset brushes you can use to edit specific areas of your image
- Select the teeth whiten brush, zoom in on the face you’re working on, and start brushing on to the affected areas you’d like to whiten/brighten
- You can also adjust the color, exposure, and whites/blacks of the specific area you’ve brushed on to. Be sure to not got overboard! Keep the look minimal and natural. There is actually nothing more tacky than and image where it is SO obvious that the teeth have been severed whitened to the point of being blinding, lol.
How to whiten eyes in Lightroom
To whiten eyes in Lightroom, it’s pretty darn simple. Just follow these steps:
- Just like we did for teeth, click into that Masking panel on the right hand side
- From Effects, select Iris Enhance, or Dodge. Dodging is a term for lightening the exposure of dark areas of an image within Photoshop or Lightroom.
- Click on they eye you’d like to brighten, and start painting on the brush. Back in that editing panel, you’ll also be able to use the amount slider to take away, or add a little more brightness to the eyes.
- As with teeth whitening, keep it natural and timeless. I like to hit the \ key a few times to see the before and after of the edit to make sure I am not over doing it.
How to use presets to whiten teeth in Lightroom
If you don’t need to meticulously edit eyes or teeth in an image, but want lower yellows in your images, bring down the yellow HSL slider to brighten teeth – OR try using presets! If you’re unfamiliar with presets, check out my Ultimate Presets Guide for further reference. My personal presets tend to have muted yellows, meaning softer skin tones, brighter eyes, and whiter teeth with just one click of a preset!
Depending on the version of Lightroom you’re using, your editing steps may look a little different. However, in general, it’ll look something like this:
1. Select the photos you wish to apply the preset to.
2. If you chose to use a custom preset, simply install and apply it:
– For Lightroom Classic CC, follow these steps.
– For Lightroom Desktop Classic, follow these steps.
– For Lightroom Mobile CC, follow these steps.
3. Once the preset is applied, you can make adjustments to the preset’s intensity by using the preset slider. This is a new tool I excitedly wrote about recently. It’s a game changer for presets and a feature I’ve been waiting for Adobe to develop forever!
I hope you found this helpful and added a new trick to your editing tool belt!
Erin
")


